| Steps | Details |
|---|---|
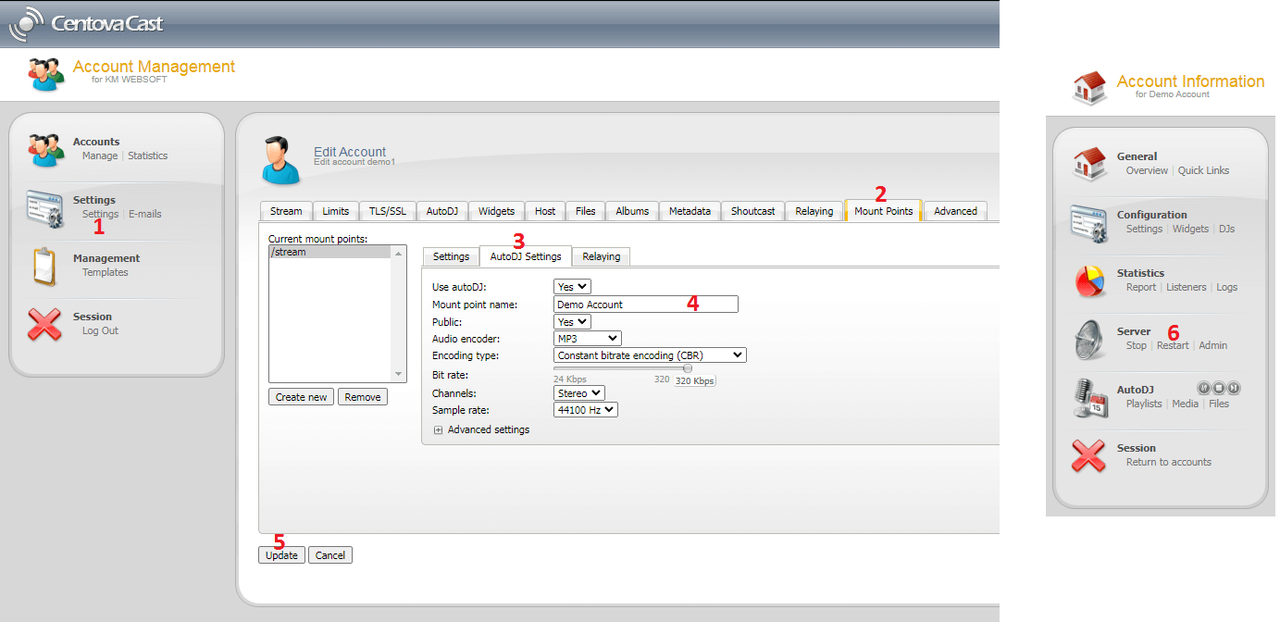
| Step 1: | Login to the centova panel, and click on Settings |
| Step 2: | Click on the Mount Points tab, (as shown in the below image with point #2) |
| Step 3: | Then click on the AutoDJ Settings tab, (as shown in the below image with point #3) |
| Step 4: | Then click on the text box where label = Mount point name, entered in the name of the mount point you want to set. (as shown in the below image with point #4) |
| Step 5: | Then click on the Update button as shown in the below image with point #5 |
| Step 6: | Finally, Restart the radio server (as shown in the below image with point #6) |
- Home
-
Store
- Browse All
- Linux Premium Web Hosting
- Shoutcast Internet Radio
- Shoutcast Internet Radio Reseller
- Linux Managed VPS
- Linux UnManaged VPS
- Cloud VPS SSD
- Server Management
- SSL Certificates
- Server Location India
- Server Location Netherlands
- ShoutCast Dedicated Servers
- Gaming dedicated server
- Flussonic Dedicated Servers
- RED5 DEDICATED SERVERS
- MANAGED DEDICATED SERVERS
- SHOUTCAST DEDICATED SERVER
- GPU Dedicated Servers
- Logo Design
- HOT DEALS
- Real Website Traffic | Keyword Targeted Visitors
- SEO Backlinks Pro
- Multi IP Dedicated Servers
- Azuracast Dedicated Server
- Website Development
- Offer.KM
- KMwebsoft Web Hosting Software Licenses
- Register a New Domain
- Transfer Domains to Us
- Announcements
- Knowledgebase
- Network Status
- Affiliates
- Contact Us
-
More


